Skip to content

Learning how to make evaporated milk from powdered milk is the fastest and most budget-friendly pantry emergency solution for home cooks. If a recipe calls for concentrated canned dairy and you do not have fresh milk or a tin on hand, dry milk solids offer an instant shortcut.
Because standard milk powder is simply whole or skim milk with almost 100% of its moisture removed, adding back less water than normal recreates the exact density of evaporated dairy in under 2 minutes.
If you want to understand the foundational definition, ingredients, and visual traits of traditional canned dairy before cooking, read our complete guide on what is evaporated milk.
Quick Summary Box (TL;DR)
Core Ratio: 1 Cup Powdered Milk + 1 Cup Warm Water = 1 Cup Instant Evaporated Milk.
Water Temp: Use warm water (110°F–120°F) to stop clumping instantly.
Preparation Time: 2 minutes (no long simmering required).
Optional Pro Tip: Simmer for 3 minutes on the stove to add a subtle caramelized flavor.
The Instant Ratio: Powdered Milk to Water Math for Evaporated Consistency
To make 1 cup (8 oz) of evaporated milk from dry milk, mix 1 cup of dry milk powder with 1 cup of warm water (a 1:1 ratio by volume). This double-concentrated ratio provides the exact thick density of canned milk without requiring lengthy stovetop simmer time.
| Target Evaporated Milk Yield | Dry Powdered Milk Required | Warm Water Needed |
| 1 Cup (8 oz) | 1 Cup (60g – 80g) | 1 Cup (8 oz) |
| 1.5 Cups (12 oz / Standard Can) | 1.5 Cups (90g – 120g) | 1.5 Cups (12 oz) |
| 2 Cups (16 oz) | 2 Cups (120g – 160g) | 2 Cups (16 oz) |
Curious about the nutritional value of homemade evaporated milk? Explore our evaporated milk nutrition facts guide to learn about its calories, protein, calcium, vitamins, and other essential nutrients per serving.
Reconstitution Method: Step-by-Step Blending Instructions

Reconstituting dry dairy solids for baking takes less than two minutes when following these simple steps:
Measure Ingredients: Measure 1.5 cups of dry milk powder and 1.5 cups of warm water into a glass measuring bowl.
Whisk Thoroughly: Whisk the powder into the water vigorously for 30 to 45 seconds until all dry particles dissolve completely.
Rest the Mixture: Let the liquid sit at room temperature for 1 minute to allow the protein structures to hydrate fully.
Final Strain (Optional): Pass the reconstituted liquid through a fine-mesh strainer to ensure zero remaining clumps.
If you prefer working with liquid dairy from your refrigerator instead of dry powders, check out our step-by-step recipe on how to make evaporated milk from regular milk.
Should You Warm the Water? The Science of Clump-Free Mixing
Yes, you should always use warm water between 110°F and 120°F (43°C – 49°C) when making evaporated milk with powdered milk because heat dissolves dairy fats and proteins instantly. Cold water causes dry lipids to clump together, resulting in a gritty liquid that ruins baked goods.
According to research from the USDA FoodData Central, dry milk solids require thermal energy to dissolve concentrated casein proteins smoothly and recreate a stable emulsion.
Quick Stovetop Simmer Method for Powdered Milk

While instant mixing works well for baking, a quick 3-minute stovetop simmer enhances the flavor and mouthfeel of dry milk reductions:
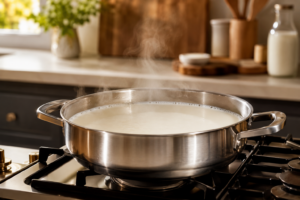
Heat the Mixture: Pour your reconstituted milk into a small saucepan over low-medium heat.
Simmer Gently: Bring it to a very light simmer for 2 to 3 minutes while stirring continuously.
Why It Helps: Gentle heating triggers mild caramelization, giving your reconstituted dry milk the signature warm, rich flavor profile of commercial canned versions.
Once your homemade evaporated milk is ready, storing it correctly helps preserve its flavor, texture, and safety. Read our guide on how to store evaporated milk for the best refrigeration and storage tips.
Adjusting the Thickness of Dry Milk for Baking Recipes
For Creamy Soups & Sauces: Add 1 tablespoon of melted unsalted butter per cup of reconstituted dry milk to increase lipid content and richness.
For Pumpkin Pies & Custards: Increase the powder ratio slightly to 1.25 cups of dry powder per 1 cup of water for extra structural firmness.
For Heart-Conscious Baking: Use nonfat dry milk powder to create a fat-free, heart-healthy option without sacrificing protein density
Proper storage of reconstituted dry milk is essential for kitchen safety. For complete storage guidelines, read our guide on how long can evaporated milk last.
Why Trust Fooder Ghor?
At Fooder Ghor, we provide educational resources focused on understanding the safe use, handling, and storage of different types of milk, including breast milk, cow’s milk, goat milk, and raw milk, based on publicly available guidance from trusted sources such as the CDC, FDA, USDA, and AAP. Some milk-related articles, particularly those involving maternal and infant feeding topics, are reviewed for clarity and presentation by nursing students with academic training in maternal and child health to help make information easier to understand. This content is provided for learning purposes only and does not offer medical advice.
Most Common Frequently Asked Questions
Yes, you can make evaporated milk from nonfat dry milk, but adding a small fraction of melted butter helps recreate the full-fat richness of traditional canned versions.
Yes, reconstituted dry milk contains no added refined sugars, making it suitable for diabetic diets in moderation. For full health guidelines, read our detailed report on is evaporated milk healthy for diabetics.
Instant reconstituted dry milk looks slightly paler because it has not undergone high-pressure commercial canning heat, which normally browns natural lactose sugars.
Conclusion
Mastering how to make evaporated milk from powdered milk is an invaluable pantry trick that saves time and money. By combining equal parts dry milk powder and warm water, you instantly create a thick, double-strength dairy concentrate perfect for baking, cooking, and beverages.
If you’re exploring more homemade milk options, try our step-by-step guide on how to make almond milk. It’s a simple dairy-free alternative that’s perfect for cooking, baking, and everyday use.