Skip to content

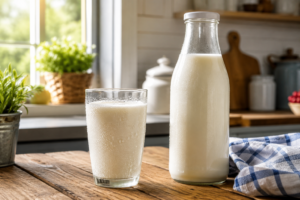
Learning how to make evaporated milk from regular milk is one of the most reliable kitchen hacks for home bakers and cooks. When a recipe calls for rich canned milk and your pantry falls short, you can easily transform standard liquid milk from your refrigerator into a velvety, concentrated ingredient using simple heat reduction.
Because commercial canned dairy is simply standard cow’s milk with 60% of its moisture evaporated, using fresh liquid dairy allows you to control the quality completely without relying on shelf-stable preservatives.
If you are completely new to this ingredient and want to understand its foundational definition, ingredients, and flavor before cooking, read our complete guide on what is evaporated milk.
Quick Summary Box (TL;DR)
Core Formula: 3.75 Cups Fresh Regular Whole Milk $\rightarrow$ 1.5 Cups Evaporated Milk (60% Reduction).
Ideal Cooking Time: 25 to 35 minutes over gentle, low heat.
Heat Control: Keep stove heat low (uncovered pan) to stop skin formation and prevent scorching.
Texture Goal: Soft ivory color that coats the back of a spoon smoothly.
The Raw Ingredient Ratio: Whole Milk to Evaporated Milk
To yield 1 cup (8 oz) of evaporated milk, you must start with 2.5 cups (20 oz) of regular whole milk to account for the 60% water loss. Using whole milk with full butterfat yields the closest flavor and body to commercial options.
| Fresh Regular Whole Milk | Expected Evaporated Yield | Equivalent Commercial Size |
| 2.5 Cups (20 oz) | 1 Cup (8 oz) | Small Can Portion |
| 3.75 Cups (30 oz) | 1.5 Cups (12 oz) | Standard Commercial Can |
| 5 Cups (40 oz) | 2 Cups (16 oz) | Large Batch Yield |
After preparing the right amount, proper storage helps preserve its freshness and quality. Read our guide on how to store evaporated milk safely for the best refrigeration and storage practices.
Step-by-Step Cooking Instructions for Regular Milk

Making evaporated milk with regular milk requires continuous attention to simmer levels and gentle stirring. Follow these simple stovetop steps:
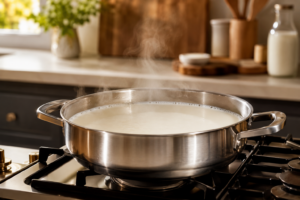
Measure and Pour: Pour 3.75 cups (30 oz) of fresh regular whole milk into a wide, heavy-bottomed stainless steel pan.
Bring to a Low Simmer: Place the pan over medium heat until tiny bubbles begin forming along the edges. Immediately turn the heat down to low.
Simmer and Scrape: Maintain a continuous, gentle simmer for 25 to 35 minutes. Gently scrape the bottom and sides of the pan with a heat-resistant spatula every minute.
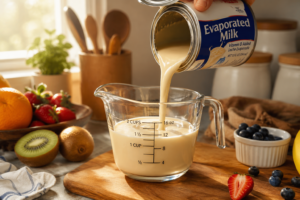
Measure Volume: Once the liquid appears visibly thickened and reduced, pour it into a liquid measuring cup to confirm it has reached 1.5 cups (12 oz).
Strain and Cool: Pass the warm liquid through a fine-mesh strainer into a glass jar to catch any small protein solids, then let it cool at room temperature.
If you ever run out of fresh liquid dairy and need alternative stovetop methods, check out our master recipe guide on how to make evaporated milk.
Temperature Control: Keeping the Heat Right to Avoid Skin Formation
The key to preventing thick skin formation when making evaporated milk from whole milk is keeping the temperature strictly between 180°F and 190°F (82°C – 88°C) while stirring continuously. Rapid boiling causes surface proteins (lactalbumin) to dehydrate quickly, creating an undesirable rubbery film on top.
According to research from the USDA FoodData Central, gentle thermal exposure allows water vapor to escape continuously while keeping delicate fat and protein structures evenly suspended throughout the liquid.
How to Tell When Your Whole Milk is Perfectly Reduced

Your whole milk is perfectly reduced when its overall volume drops by 60%, its texture coats the back of a spoon lightly, and the color turns a warm, soft ivory. * Volume Test: The liquid volume drops from 3.75 cups down to exactly 1.5 cups.
Visual Color Shift: The bright white color transforms into a light ivory or subtle cream hue due to mild natural sugar caramelization.
Spoon Coating: A wooden spoon dipped into the pan comes out with a thin, silky layer of milk that does not immediately run off like water.
Once your evaporated milk reaches the perfect consistency, proper storage becomes the next priority. Learn how to recognize spoilage signs in our guide on does evaporated milk go bad.
Chef’s Tips for a Richer, Creamier Stovetop Reduction
Use a Wide Pan: A wider surface area allows steam to escape significantly faster, shortening your reduction time by 5 to 10 minutes.
Never Cover with a Lid: Keep the pan uncovered at all times so water vapor can evaporate freely into the air.
Whisk Before Straining: Whisking the reduced milk vigorously for 20 seconds before passing it through cheesecloth creates an exceptionally smooth, velvety mouthfeel.
Proper temperature management during cooking also ensures your homemade batch stays fresh longer. For safe storage and shelf-life instructions, visit our guide on how long can evaporated milk last.
Why Trust Fooder Ghor?
At Fooder Ghor, we provide educational resources focused on understanding the safe use, handling, and storage of different types of milk, including breast milk, cow’s milk, goat milk, and raw milk, based on publicly available guidance from trusted sources such as the CDC, FDA, USDA, and AAP. Some milk-related articles, particularly those involving maternal and infant feeding topics, are reviewed for clarity and presentation by nursing students with academic training in maternal and child health to help make information easier to understand. This content is provided for learning purposes only and does not offer medical advice.
Most Common Frequently Asked Questions
Yes, you can make evaporated milk from low-fat or 2% regular milk, but the final liquid will have a noticeably thinner consistency and less rich flavor than full-fat whole milk versions.
Yes, homemade evaporated milk made from whole milk contains no added refined sugars, making it suitable for diabetic recipes in moderate portions. For health details, read our guide on is evaporated milk healthy for diabetics.
Regular milk turns slightly golden during reduction because heat triggers a natural Maillard reaction, lightly caramelizing the natural lactose sugars in the dairy.
Conclusion
Mastering how to make evaporated milk from regular milk gives you complete freedom in the kitchen using simple ingredients already sitting in your fridge. By applying gentle heat, monitoring surface temperature, and reducing standard whole milk by 60%, you recreate the exact density, creaminess, and performance of canned options for any recipe.
While homemade evaporated milk is simple to prepare, it’s also important to know when it may not be suitable for everyone. Read our complete guide on evaporated milk health side effects to understand the potential risks for certain individuals.