Skip to content

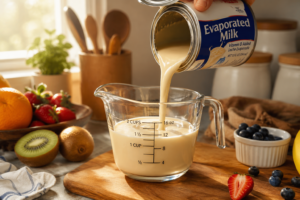
Making rich, creamy dairy from scratch is a essential skill for home cooks. If you are halfway through a baking recipe and realize your pantry is empty, learning how to make evaporated milk at home saves the day using basic whole milk.
Because commercial evaporated milk is simply fresh cow’s milk with 60% of its water content removed through controlled heating, you can easily replicate this process on your stovetop without chemical additives. If you want to understand how concentrated dairy differs in flavor before cooking, read our guide on what does evaporated milk taste like.
Quick Summary: How to Make Evaporated Milk
The Core Concept: Evaporated milk is simply fresh milk with 60% of its water removed through heat.
Key Ingredient: Fresh whole milk (30 oz / 3¾ cups fresh milk yields 12 oz / 1½ cups evaporated milk).
Cooking Time: 25 to 35 minutes over gentle, low heat on the stovetop.
Essential Technique: Maintain a soft simmer—never boil rapidly. Stir continuously and scrape the bottom to prevent scorching.
Pro Tip for Smoothness: Always strain the finished milk through a fine-mesh strainer or cheesecloth to filter out skin and lumps.
Once your homemade evaporated milk is ready, proper storage is essential to maintain its freshness and safety. Learn more in our guide on how long does evaporated milk last.
Ingredients and Tools Required for the Base Recipe

To make homemade evaporated milk, you need only one primary ingredient, fresh whole milk and a few basic kitchen tools like a wide heavy-bottomed pan and a fine-mesh strainer. Using whole milk provides the best fat concentration and creamy mouthfeel.
Ingredients:
30 oz (3¾ cups) Fresh Whole Milk: Yields approximately 12 oz (1½ cups) of homemade evaporated milk (equivalent to one standard commercial tin).
Essential Tools:
Wide, Heavy-Bottomed Pot or Stainless Steel Pan: A wide surface area accelerates steam evaporation.
Heat-Resistant Silicone Spatula or Wooden Spoon: Essential for scraping the bottom to prevent milk proteins from scorching.
Fine-Mesh Strainer or Cheesecloth: Guarantees a completely smooth, lump-free texture.
Glass Measuring Cup: For measuring the exact 60% volume reduction.
If you also enjoy making dairy-free alternatives from scratch, check out our step-by-step guide on how to make almond milk for another easy homemade option.
How Long to Boil Milk to Make Evaporated Milk?
It takes approximately 25 to 35 minutes of gentle simmering on low heat to reduce 30 ounces of whole milk down to 12 ounces. You should never rapidly boil the liquid, as intense heat scorches natural lactose sugars and damages the clean dairy flavor.
According to research from the USDA FoodData Central, milk is composed of roughly 87% water, meaning precise, slow thermal reduction is required to concentrate the remaining solids without scorching.
Step-by-Step Stovetop Making Process
Step 1: Measuring and Simmering the Milk
Pour 30 ounces (3¾ cups) of fresh whole milk into your wide, heavy-bottomed pan. Place the pan over medium heat until the liquid becomes warm, then immediately lower the temperature. Bring the milk to a steady, gentle simmer without letting it boil over.
Step 2: Skimming and Reducing to 60%

Stir the milk continuously with your spatula, making sure to sweep the bottom of the pan every minute. As steam rises, skim off any skin that forms on top. Continue simmering until the liquid reduces by 60%, leaving exactly 12 ounces (1½ cups) of concentrated dairy.
Step 3: Straining for a Silky Smooth Texture

Remove the pan from the heat once you reach the target volume. Pour the hot liquid through a fine-mesh strainer into a clean glass container to filter out any cooked milk solids. Allow your fresh homemade batch to cool before using or storing.
To preserve the safety and freshness of your homemade batch, check out our baseline guide on how to store evaporated milk.
Troubleshooting: How to Fix Burnt or Lumpy Homemade Milk
If your homemade evaporated milk develops small lumps or a surface film, passing it through a fine-mesh strainer or blending it for 15 seconds instantly restores a smooth texture. However, if the milk scorches at the bottom of the pan, do not scrape the pan; carefully pour the unscorched top liquid into a fresh pot.
For Small Lumps: Strain the warm liquid twice through cheesecloth or whisk vigorously for 30 seconds.
For Scorched Flavors: Stop stirring immediately, strain only the top unscorched liquid into a fresh vessel, and discard the burnt bottom layer.
If you enjoy preparing homemade milk from scratch, you may also like our step-by-step guide on how to make soy milk for a nutritious plant-based alternative.
Quick Cooking Chart: Milk Volume Reduction Guide

| Starting Fresh Milk Volume | Desired Evaporated Milk Yield | Estimated Simmering Time |
| 2½ Cups (20 oz) | 1 Cup (8 oz) | 20 – 25 Minutes |
| 3¾ Cups (30 oz) | 1½ Cups (12 oz / Standard Can) | 25 – 35 Minutes |
| 5 Cups (40 oz) | 2 Cups (16 oz) | 35 – 45 Minutes |
Curious about what homemade evaporated milk provides nutritionally? Explore our complete evaporated milk nutrition guide for calories, protein, calcium, vitamins, and other essential nutrients.
Why Trust Fooder Ghor?
At Fooder Ghor, we provide educational resources focused on understanding the safe use, handling, and storage of different types of milk, including breast milk, cow’s milk, goat milk, and raw milk, based on publicly available guidance from trusted sources such as the CDC, FDA, USDA, and AAP. Some milk-related articles, particularly those involving maternal and infant feeding topics, are reviewed for clarity and presentation by nursing students with academic training in maternal and child health to help make information easier to understand. This content is provided for learning purposes only and does not offer medical advice.
Frequently Asked Questions
Yes, you can make evaporated milk using skim or 2% milk, but the resulting liquid will be less creamy in body compared to whole milk variations.
Homemade evaporated milk turns slightly golden due to the natural Maillard reaction, where milk sugars condense and brown lightly under gentle heat.
Yes, homemade evaporated milk matches store-bought options in moisture content and richness, though commercial tins undergo pressure sterilization for long-term shelf life. For details on evaluating commercial canning integrity or spoilage, read our guide on does evaporated milk go bad.
Conclusion
Mastering how to make evaporated milk at home is a practical culinary skill that improves your scratch cooking. By maintaining a low simmer and reducing fresh milk volume by 60%, you achieve the exact rich density needed for soups, sauces, and desserts without a trip to the store. Keep your heat low, stir frequently, and enjoy fresh, additive-free concentrated dairy right from your stovetop.
Now that you know how to make evaporated milk at home, discover how this concentrated dairy can support balanced nutrition in our guide on evaporated milk benefits.