Skip to content
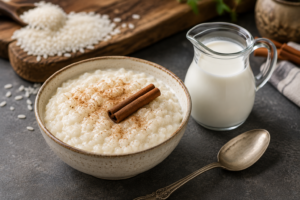
Introducing your children to diverse culinary traditions is a wonderful way to expand their palates while keeping family dessert time exciting. A classic Southeast Asian sticky rice dessert is a brilliant option for families looking for comforting, allergen-friendly alternatives to traditional puddings. Made entirely without heavy animal fats, this tropical dish delivers an incredibly velvety mouthfeel using simple, plant-based pantry staples.
In this comprehensive guide, we will walk you through exactly how to make sweet rice with coconut milk from the comfort of your own kitchen. We will discuss critical grain choices, master the sweet coconut reduction sauce, and explore delicious toppings your whole family will love.
Short Summary
Dairy-Free Core: Rich coconut fats substitute perfectly for traditional cow’s milk, making this treat completely vegan-safe.
Grain Selection: Authentic glutinous sticky rice yields the signature chewy texture needed to absorb sweet plant creams.
Separated Cooking: Steaming or boiling the grains before adding your sauce prevents the mixture from turning into a mushy paste.
Glossy Coating: Incorporating warm coconut cream creates a gorgeous, shiny lacquer layer over every single grain.
Topping Balance: Slicing fresh, sweet yellow mangoes adds a brilliant contrast to the rich, salty-sweet profile of the rice.
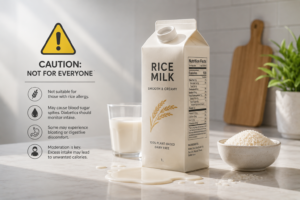
If you enjoy exploring rice based foods beyond desserts, discover the rice milk benefits and learn how this popular dairy free beverage can fit into a balanced everyday diet.
Why Coconut Milk is Perfect for Sweet Rice
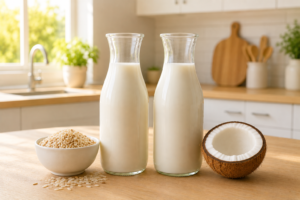
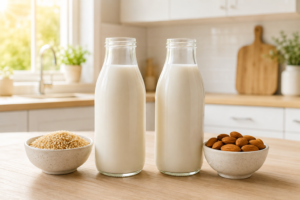
When exploring plant-based alternatives for traditional family desserts, coconut milk stands out as an exceptional choice. Unlike thin grain milks, the natural lipid structure of coconut meat provides a dense, rich texture that coats grains beautifully without requiring synthetic thickeners.
For families balancing food sensitivities or milk lactose intolerances, using coconut milk ensures your children can enjoy a rich dessert experience without digestive discomfort. The subtle, tropical sweetness inherent in palm fruit blends naturally with traditional dessert spices, providing a comforting, nutty aroma that fills your home as it simmers.
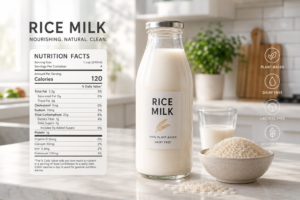
Because ingredients and nutrient levels vary between brands, FDA nutrition information encourages consumers to review the Nutrition Facts label before choosing canned coconut milk for recipes.
👉 To understand how coconut extractions differ from everyday grain alternatives in liquid consistency, read our analysis on rice milk vs coconut milk.
Ingredients You Will Need
Creating an authentic, restaurant-quality dairy-free dessert requires gathering a few specific ingredients that handle plant-based fats correctly. Balancing your starches with the right liquids makes a massive difference in the final product.
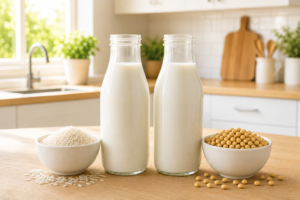
Glutinous Rice: One and a half cups of raw sticky rice.
Canned Coconut Milk: One full fourteen-ounce can of high-quality, full-fat coconut milk.
White Sugar: One-half cup of granulated sugar to sweeten the cream.
Salt: One-half teaspoon of fine salt to cut through the heavy plant lipids.
Toppings: Freshly sliced ripe mangoes and toasted sesame seeds.
If you prefer homemade ingredients, learn how to make coconut milk and use it instead of canned coconut milk in this recipe.
Choosing the Right Rice (Glutinous vs. Jasmine Rice)
To learn how to make sweet rice with coconut milk successfully, you must select the correct grain variety. Authentic Thai-style desserts rely exclusively on glutinous rice (often sold as “sweet rice” or “sticky rice”). This specific long-grain variety contains high levels of amylopectin starch, which creates a distinctively chewy, cohesive texture when cooked.
While aromatic jasmine rice can be used as a quick substitute in a pinch, it contains a different starch profile that tends to absorb liquids unevenly. Using jasmine rice will result in a texture that mirrors standard dinner rice rather than the delightfully sticky, melt-in-your-mouth body that defines this classic dessert.
Discover how different grain profiles impact overall family health by checking out our breakdown on is rice milk good for you.
Step-by-Step Coconut Rice Cooking Guide

Rushing through a plant-based dessert can lead to uneven textures. Following these structured steps guarantees a perfectly cooked treat every time.
Step 1: Steaming or Cooking the Rice
Begin by rinsing your glutinous sticky rice several times in cold water until the water runs completely clear to remove excess surface powders. Place the rinsed grains into a large bowl, cover them with cool water, and allow them to soak for at least four hours (or overnight for the best results).
Once soaked, drain the water fully. For authentic results, place the damp grains into a cheesecloth-lined steamer basket over boiling water, cover tightly, and steam for twenty-five minutes until tender and translucent. Alternatively, you can use a standard kitchen rice cooker with a slightly reduced water ratio to prevent sogginess.
If you enjoy preparing homemade plant based ingredients, explore our guide on how to make almond milk and compare its simple preparation with other dairy free kitchen staples.
Step 2: Preparing the Sweet Coconut Milk Sauce
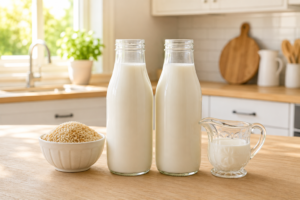
While your starches are steaming on the stovetop, open your can of full-fat coconut milk, ensuring you shake it well to blend any separated solids. In a separate small saucepan, combine one cup of the rich coconut milk with your half-cup of white sugar and half-teaspoon of salt.
Warm the mixture over medium-low heat, stirring constantly with a whisk until the sugars and salt dissolve fully into the liquid. Bring it to a very brief simmer, then remove the pan from the burner heat. Set aside the remaining coconut milk left in the can to use later as a fresh drizzling sauce.
👉 If you enjoy making homemade pantry staples, learn how to make rice milk and use it as a dairy free ingredient in smoothies, desserts, and other everyday recipes.
Step 3: Combining Rice and Coconut Cream
Immediately transfer your hot, freshly steamed sticky rice into a medium ceramic mixing bowl. Pour the warm, sweetened coconut sauce directly over the hot grains, stirring gently with a rubber spatula to break up any large clumps.
It may look quite liquid at first, but do not worry. Cover the bowl tightly with a lid or plastic wrap and allow it to sit undisturbed on your kitchen counter for twenty to thirty minutes. During this resting period, the hot grains will completely absorb the sweet coconut lipids, resulting in a rich, glossy finish.
USDA FoodData Central lists coconut milk as a food naturally containing saturated fat, while the exact nutrient profile can vary between products and recipes.
👉 For comparison on how classic dairy liquids handle starch thickeners during home baking, read our guide on how to make sweet rice with milk.
Serving Suggestions (Mango, Sesame Seeds, or Coconut Flakes)

The true magic of this dairy-free dessert lies in the final presentation, where you can combine temperatures and textures for an incredible dining experience.
Fresh Ripe Mango: Serve the warm sticky rice alongside chilled, freshly sliced sweet yellow mangoes for a classic tropical flavor profile.
Toasted Sesame Seeds: Sprinkle a teaspoon of toasted white or black sesame seeds over the rice to introduce a delightful, smoky crunch.
Toasted Coconut Flakes: Dust unsweetened coconut shreds over the top to enhance the underlying nuttiness of the dish.
Salty Coconut Drizzle: Warm the remaining coconut milk left in the can with a tiny pinch of salt and spoon it over the rice right before serving.
👉 To read about how different alternative milk bases handle natural sweetness profiles, see our post on rice milk nutrition.
Why Trust Fooder Ghor?
At Fooder Ghor, we provide educational resources focused on understanding the safe use, handling, and storage of different types of milk, including breast milk, cow’s milk, goat milk, and raw milk, based on publicly available guidance from trusted sources such as the CDC, FDA, USDA, and AAP. Some milk-related articles, particularly those involving maternal and infant feeding topics, are reviewed for clarity and presentation by nursing students with academic training in maternal and child health to help make information easier to understand. This content is provided for learning purposes only and does not offer medical advice.
FAQs About Coconut Sweet Rice
No, carton-style options are diluted heavily with water, which lacks the necessary natural fat concentration required to make the rice rich and sticky.
This occurs if the grains were not soaked long enough before cooking, or if the rice was exposed to direct airflow while absorbing the sweet sauce.
You can store leftovers in a sealed airtight container for up to three days, though the rice will naturally firm up when exposed to cold temperatures.
Place the desired portion into a microwave-safe bowl, add a tablespoon of water or coconut milk, cover with a damp paper towel, and heat for 45 seconds until soft.
Conclusion
Learning how to make sweet rice with coconut milk opens up a wonderful world of rich, dairy-free dessert options for your home kitchen. By choosing authentic glutinous rice and allowing the warm grains to absorb the sweet plant sugars completely, you can create a luxurious, glossy treat that rivals your favorite Thai restaurant. This allergy-friendly recipe is incredibly easy to customize with fresh fruits and toasted seeds, making it a guaranteed hit for family gatherings.
Be sure to wrap your leftover portions securely to keep the grains wonderfully soft and chewy for your next family snack time.
👉 For extra help with maintaining optimal shelf life timelines for your plant-based household ingredients, read our tutorial on how long does rice milk last.