Skip to content
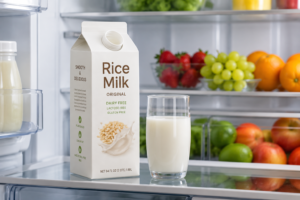
Rice milk is a wonderful plant-based dairy alternative that has become a popular choice in millions of American households. Many families use this because it is naturally nut-free, soy-free, and incredibly gentle on sensitive tummies. Learning how to make rice milk at home is an amazing way to provide a fresh drink for your family while keeping full control over the quality of your food. In this comprehensive recipe guide, we will walk you through the simplest method to create your own smooth, delicious, and budget-friendly alternative dairy staple right in your kitchen.
Quick Summary
Simplicity: This homemade recipe requires only a few basic kitchen tools and four simple ingredients.
Texture Control: Following proper blending steps ensures your drink remains smooth without becoming unpleasantly thick or slimy.
Allergen-Friendly: It serves as a perfectly reliable and safe beverage for children with severe dairy or nut allergies.
Customization: You can easily adjust the sweetness and flavor notes to match your family’s personal taste preferences.
What Is Rice Milk Made Of? (Ingredients)
When parents decide to switch to plant-based options, they frequently ask what is in rice milk and what is rice milk made of. In simple terms, commercial varieties often contain stabilizers, but your homemade version keeps things clean and transparent. The exact rice milk ingredients are highly basic and easy to find in any grocery store pantry.
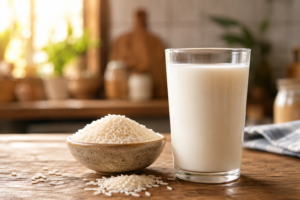
To create a standard batch, you will need the following baseline components:
Rice: One cup of high-quality organic grain, which forms the nutritious foundation of the entire drink.
Water: Four cups of clean filtered water for blending, plus extra water for the initial preparation steps.
Sweetener (Optional): A touch of pure maple syrup, honey, or whole pitted dates to enhance the gentle flavor.
Salt: A tiny pinch of sea salt to balance the natural sugars and round out the final taste profile.
Although these ingredients are simple and naturally dairy-free, rice milk may not be the best choice for everyone. Read our guide on rice milk side effects to learn about potential concerns, who should drink it in moderation, and how to choose the healthiest option for your family.
Choosing the Right Rice
Choosing the correct grain type is a simple ingredient choice that affects your final beverage. For a classic, mild flavor, organic long-grain white rice works beautifully because it blends smoothly and yields a clean color. On the other hand, using brown rice provides a richer texture and boosts the presence of naturally occurring nutrients, though it gives the drink a slightly toasted and earthy tone.
👉 To understand the basic health profiles of different grains before selecting your ingredients, explore our comprehensive guide on what is rice milk for more details.
How to Make Rice Milk at Home (Step-by-Step Guide)

Learning how to make a rice milk batch does not require any advanced culinary skills or expensive machinery. Anyone can easily master how to make milk with rice by following a few clear chronological steps. This household method is highly efficient and can be completed in less than twenty minutes once your grains are ready.
Here is the exact step-by-step framework used in most kitchens to get a flawless, creamy consistency every single time.
Step 1: Cook or Soak the Rice
The very first phase involves preparing your grains to ensure they are soft enough for your kitchen blender. For this specific recipe, using cooked rice is highly recommended because it naturally yields a much smoother texture than raw grains. Simply cook one cup of your chosen rice according to standard package instructions without adding any butter or oils. Alternatively, if you prefer using raw grains, you must soak them in warm water for at least twelve hours to soften the outer layers.
According to nutrition data published by the USDA, cooking the grain helps gelatinize the starches, which makes the final beverage much easier to digest for young children.
Step 2: Blend It Right
Once your grains are fully cooked and cooled to room temperature, transfer them carefully into a high-speed blender container. Pour in four cups of cold filtered water along with your salt and chosen sweetening elements. Set your blender to a high speed, but keep a very close eye on the clock during this mechanical process. You only need to blend the mixture for about 30 to 45 seconds altogether to break down the grains efficiently.
According to the FDA, all food-contact surfaces, utensils, and equipment should be properly cleaned and sanitized before preparing homemade foods to help reduce the risk of contamination.
Step 3: Strain for a Smooth Texture

The final step is where you separate the liquid milk from the leftover solid grain particles. Place a large nut milk bag or a clean piece of fine cheesecloth over a deep glass mixing bowl or pitcher. Pour the blended liquid slowly into the bag, allowing the smooth white milk to pass through naturally into the container below. Gently gather the top of the cloth and squeeze it with very light pressure to extract the remaining moisture without forcing the thick sediment through the fabric layers.
Pro Tips for the Best Homemade Rice Milk
A very common issue many people experience when making this drink for the first time is that the liquid can turn out strangely slimy or gummy. This happens because grains release heavy starches when they are handled incorrectly or agitated too much during preparation.
To help you achieve a commercially smooth consistency without any unwanted thickness, try utilizing these practical kitchen tips:
Use Ice-Cold Water: Always use chilled or ice-cold water during the blending phase, as warm water activates the starches and creates an instant slimy texture.
Do Not Over-Blend: Keep your blending time under 45 seconds because running the motor for too long generates friction heat, which thickens the starches quickly.
Avoid Squeezing Too Hard: When straining your mixture, let gravity do most of the work rather than aggressively squeezing the nut milk bag.
Keep a Clean Strainer: Rinse your cheesecloth or mesh straining bag thoroughly between batches to prevent starch buildup from ruining your liquid flow.
According to the USDA, homemade foods should be prepared using clean utensils, sanitized equipment, and safe food handling practices to help reduce the risk of contamination and maintain quality.
👉 For parents who want to know how long their freshly strained kitchen batches will remain safe to consume, see our detailed guide on how long does rice milk last in the refrigerator.
How to Flavor and Sweeten Your Rice Milk

A plain batch of homemade grain milk can sometimes taste a bit watery or flat on its own. For most people, adding natural flavor enhancers is a wonderful way to transform this simple pantry ingredient into a highly delicious, family-friendly beverage. Focusing on natural sweeteners ensures your drink remains incredibly wholesome and free from refined industrial sugars.
Here are some popular and incredibly tasty combinations you can easily add directly into your blender jar:
Classic Vanilla: Add one teaspoon of pure vanilla extract and two whole pitted dates during the blending process for a beautiful, comforting aroma.
Warm Cinnamon Spice: Drop in half a teaspoon of ground cinnamon and a tablespoon of pure maple syrup to create a cozy morning drink.
Rich Honey Blend: Stir in one tablespoon of honey after straining for a smooth, traditional sweetness. Avoid adding honey if the drink is intended for children under 12 months of age.
Creamy Chocolate Option: Blend in a tablespoon of unsweetened cocoa powder and a touch of liquid stevia for a quick dairy-free chocolate treat.
According to the USDA Dietary Guidelines for Americans, limiting added sugars is an important part of a healthy eating pattern. Choosing naturally flavored ingredients without excessive added sweeteners can help keep homemade rice milk balanced for everyday enjoyment.
👉 To learn more about how the natural flavor profile changes when you add these optional ingredients, read our flavor analysis on what does rice milk taste like for expert tasting notes.
Why Trust Fooder Ghor?
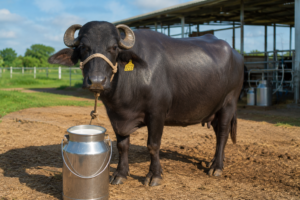
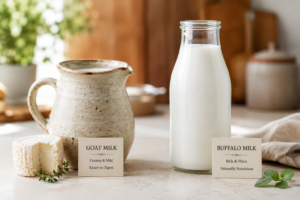
At Fooder Ghor, we provide educational resources focused on understanding the safe use, handling, and storage of different types of milk, including breast milk, cow’s milk, goat milk, and raw milk, based on publicly available guidance from trusted sources such as the CDC, FDA, USDA, and AAP. Some milk-related articles, particularly those involving maternal and infant feeding topics, are reviewed for clarity and presentation by nursing students with academic training in maternal and child health to help make information easier to understand. This content is provided for learning purposes only and does not offer medical advice.
Frequently Asked Questions
Yes, using a commercial powder is a very quick option, and you can learn what is rice milk powder to understand how to mix it instantly with warm water.
The remaining grain pulp is an excellent, fiber-rich ingredient that works well in baking recipes, pancake batters, or homemade oatmeal bowls.
No, homemade plant milks lack essential infant nutrients, and you should always check how to store colostrum or consult a pediatrician for proper infant nutrition.
Separation is a completely natural occurrence because this recipe contains zero chemical emulsifiers, so simply give the bottle a quick shake before daily use.
👉 If you utilize multiple plant alternatives in your home kitchen, you can also review our guide on how to make oat milk to expand your dairy-free skills.
Conclusion
In simple terms, mastering how to make rice milk at home is a simple, budget-friendly skill that provides a wonderful allergen-safe option for your family. By using clean white or brown grains, cold water, and a few natural sweetening elements, you can easily avoid the preservatives found in commercial store brands. Always remember to blend quickly and strain gently to maintain a perfectly smooth consistency for your morning meals.
To discover more about creating high-quality plant-based ingredients directly in your home kitchen, learn how to make almond milk for another delicious nut-based dairy alternative.