Skip to content

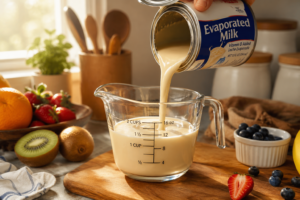
In everyday cooking, many home cooks want lighter options for their favorite household recipes. Learning how to make low-fat evaporated milk at home gives you complete control over caloric intake without sacrificing smooth creamy textures. Standard commercial evaporated milk is concentrated whole milk that has lost about sixty percent of its water volume during simmering. By using reduced-fat or skim milk, you can prepare a practical, familiar substitute that fits perfectly into low-calorie diets and healthy daily meals.
Short Summary
Homemade light evaporated milk is prepared by slowly simmering skim or reduced-fat milk to evaporate moisture.
Selecting between one percent low-fat milk and zero-fat skim milk depends on your preferred taste and texture goals.
Low-fat milk solids require continuous gentle stirring on low stovetop heat to prevent bottom scorching and pan sticking.
Straining finished milk through a fine sieve removes unwanted skin solids, leaving a perfectly silky consistency.
Proper cooling in glass containers maintains freshness and storage safety inside your household refrigerator.
At the same time, if you want to understand how standard milk behaves in recipes, check our practical guide on how to make evaporated milk from regular milk.
Input Requirements: Selecting 1% vs. Fat-Free Skim Milk
When preparing a light homemade evaporated milk recipe, selecting your base dairy liquid is the very first step. Fresh one percent low-fat milk contains a subtle amount of butterfat, which helps create a smoother mouthfeel in soups and drinks. On the other hand, fat-free skim milk offers the absolute lowest calorie count, making it a popular choice for light baking.
In general, skim milk takes a bit more care on the stove because it lacks natural creaminess. For everyday cooking, both options serve as a versatile ingredient for modern kitchens.
| Milk Type Base | Fat Percentage | Consistency Level | Ideal Kitchen Use |
| 1% Low-Fat Milk | ~1% Fat | Light & Smooth | Soups, Sauces, Coffee |
| Fat-Free Skim Milk | 0% Fat | Very Thin & Lean | Desserts, Baking, Smoothies |
| 2% Reduced-Fat Milk | ~2% Fat | Medium Creamy | Everyday Household Meals |
Many families use this because many home cooks choose skim milk because it provides protein and calcium with very little milk fat. Depending on the recipe, choosing one percent milk gives slightly better body when added to warm liquids.
If you want to understand the base liquid in more detail, explore our guide on what is skim milk.
According to the USDA FoodData Central, plain fat-free skim milk provides protein, calcium, and other essential nutrients while containing little or no milk fat.
Step-by-Step Low-Fat Milk Simmering Process

Required Ingredients & Equipment
- 4 cups fresh cold skim milk
- Wide heavy-bottomed stainless steel saucepan or skillet
- Silicone spatula or wooden spoon
- Fine mesh strainer
- Clean glass container with an airtight lid
Step 1: Measure the Milk
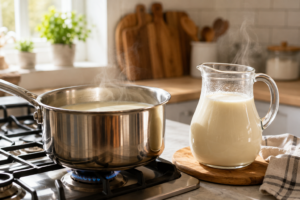
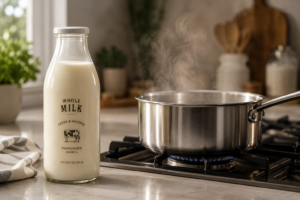
Pour 4 cups of fresh cold skim milk into a wide, heavy-bottomed stainless steel saucepan or skillet. A wider pan provides more surface area, allowing moisture to evaporate more efficiently.
Step 2: Heat the Milk
Place the saucepan over medium heat until the milk is hot and small bubbles begin to appear around the edges. Reduce the heat before it reaches a vigorous boil.
Step 3: Maintain a Gentle Simmer
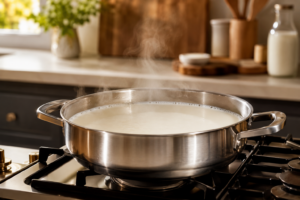
Lower the heat to low and maintain a gentle, steady simmer throughout the cooking process.
Step 4: Stir Regularly
Stir the milk frequently with a silicone spatula or wooden spoon, scraping the bottom of the pan to help prevent sticking and scorching.
Step 5: Reduce the Volume
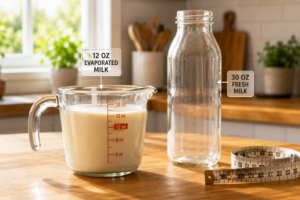
Continue simmering for 25–35 minutes, or until the milk has reduced by approximately 50%, leaving about 2 cups of concentrated skim evaporated milk.
Step 6: Strain and Cool
Remove the saucepan from the heat and pour the warm milk through a fine mesh strainer into a clean glass container. Allow it to cool slightly before refrigerating.
This homemade skim evaporated milk works well in lighter soups, sauces, custards, porridges, and other recipes that call for evaporated milk with less fat. According to the FDA, perishable foods should be refrigerated promptly and should not be left at room temperature for more than 2 hours (or 1 hour if the temperature is above 90°F (32°C)).
For storage duration details after preparing your fresh batch, review our helpful guide on how long can evaporated milk last.
The Scorching Prevention Hack: Dealing with Low-Fat Milk Solids

Cooking reduced-fat milk presents a unique kitchen challenge because skim milk solids burn much faster than fat-rich cream. Without butterfat to shield milk proteins, high stove heat causes proteins to stick to the hot pot floor and brown quickly.
In many cases, using a heavy-bottomed pan or heat-diffuser plate under your saucepan keeps heat evenly distributed across the cooking surface.
Kitchen Prevention Rule: Never allow low-fat dairy to reach a hard rolling boil. Maintaining a gentle, steady simmer can help reduce the chance of scorching and preserve a smoother appearance and flavour.
In simple terms, gentle heating and regular stirring can help reduce the likelihood of scorching that spoil your finished batch. For example, stirring in a slow figure-eight pattern ensures every part of the liquid moves regularly across the heated metal.
According to the CDC, washing hands, utensils, cookware, and food preparation surfaces before and after preparing food helps reduce the spread of germs that can cause foodborne illness.
If you ever plan to prepare extra skimmed batches in advance, check out our guide on can you freeze skim milk.
How to Keep Skimmed Evaporated Milk Silky and Non-Grainy
Low-fat dairy liquids can sometimes form a thin skin on top during long stovetop reduction. If left unmanaged, this skin breaks down into small white flecks, creating a slightly grainy texture in drinks or gravies.
At the same time, some home cooks add a very small pinch of baking soda during simmering to help maintain a smoother texture, although this step is optional and results may vary depending on the recipe.
Straining your freshly reduced liquid through double-layered cheesecloth or a fine sieve ensures every grain is removed. This easy step creates a smooth, familiar consistency for everyday use.
One important thing to know is that whisking the cooled milk before use can help redistribute any slight separation and produce a more even consistency. This simple step works well in desserts where smooth presentation matters most.
For most people, a quick strain takes under two minutes and makes a big difference in final recipe quality.
According to the CDC, using clean food storage containers, utensils, and food preparation surfaces helps reduce the spread of germs that can cause foodborne illness.
To compare how skimmed milk holds up nutritionally during daily cooking, read our overview on skim milk nutrition.
Visual Milestones: Testing the Thickness Without the Fat Content

Because skim milk lacks butterfat, it will not feel as thick as whole milk evaporated versions. Knowing how to judge reduction depth without relying on fat density is crucial for success.
First, look for a gentle color change from stark cool white to a light warm off-white shade. Second, check the liquid surface for a subtle increase in liquid viscosity as steam escapes.
The Spoon Back Test: Dip a clean metal spoon into the simmering liquid. The reduced milk should coat the spoon back thinly without running off instantly like water.
The Volume Line Check: Mark your pan’s inner sidewall with a ruler before starting so you know exact half-reduction levels.
The Cool Drop Test: Place a drop of hot reduced milk onto a chilled plate. If it holds a soft rounded shape without spreading instantly, your batch is ready.
That said, fresh low-fat evaporated milk thickens slightly more as it cools down inside the refrigerator. Another popular choice for home cooks is learning classic standard reduction techniques, which you can explore in our baseline recipe guide on how to make evaporated milk.
Why Trust Fooder Ghor?
At Fooder Ghor, we provide educational resources focused on understanding the safe use, handling, and storage of different types of milk, including breast milk, cow’s milk, goat milk, and raw milk, based on publicly available guidance from trusted sources such as the CDC, FDA, USDA, and AAP. Some milk-related articles, particularly those involving maternal and infant feeding topics, are reviewed for clarity and presentation by nursing students with academic training in maternal and child health to help make information easier to understand. This content is provided for learning purposes only and does not offer medical advice.
Frequently Asked Questions
Yes, fat-free skim milk works well for preparing a lean, low-calorie version. Keep stove heat very low and stir constantly to prevent burning the milk proteins.
Graininess happens when milk skin forms on the surface during simmering and gets mixed back into the pan. Straining the warm milk through a fine sieve solves this problem quickly.
Spoiled reduced milk develops a sharp sour smell, a yellowish discoloration, or visible clumps. If you notice any unusual odor or curdling, discard the batch immediately. Read more about spoilage signs in our guide on does can evaporated milk go bad.
Conclusion
Mastering how to make low-fat evaporated milk at home is a simple, practical way to enjoy lighter recipes without buying commercial canned options. By slowly simmering fresh skim milk over low heat and stirring continuously, you create a versatile, nutrient-rich ingredient for all your kitchen needs. Always strain your warm batch and keep it stored cold in a clean glass bottle inside your refrigerator.
For further health and dietary details regarding reduced-fat concentrated dairy options, review our informational guide on is evaporated milk healthy.